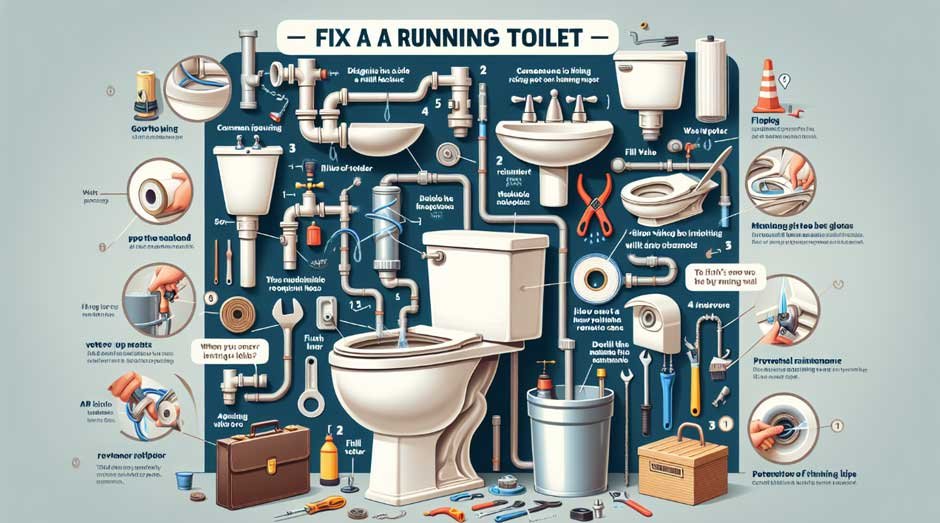
A running toilet is more than just an annoyance; it represents a wastage of water and can significantly increase your utility bills. Understanding how to fix a running toilet is essential for homeowners looking to save on costs and maintain their homes in optimal condition. This task, often perceived as daunting, is manageable with the right knowledge and tools. By addressing this issue, homeowners can prevent further damage, conserve water, and ensure their toilets function correctly.
This article will guide readers through the process of diagnosing and fixing a running toilet, beginning with grasping the basics of toilet mechanics. It will cover key steps such as diagnosing a running toilet, fixing a faulty flapper, adjusting or replacing the float and fill valve, dealing with the flush valve and chain, solving water level problems in the tank, addressing external leaks, and the importance of preventive maintenance for toilets. By delving into these areas, the article offers comprehensive DIY solutions that empower homeowners to tackle this common household problem confidently.
Understanding the Mechanics of Your Toilet
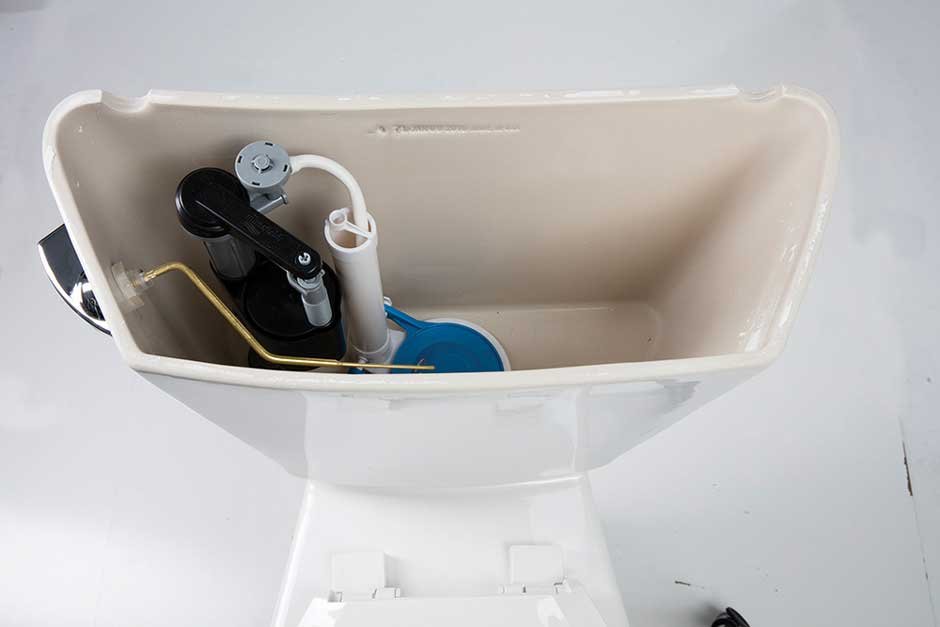
To grasp how to fix a running toilet, one must first understand the inner workings of this essential household fixture. A toilet’s functionality is surprisingly simple, relying on a few key components and the natural forces of gravity and water flow.
Components of a Toilet
- Handle and Chain: The journey of a flush begins when the handle is pressed. This action pulls a chain connected to the flapper at the bottom of the tank.
- Flapper: The lifted flapper allows water to rush from the tank into the bowl, initiating the flush.
- Fill Valve: Once the tank empties, the fill valve refills the tank with water from the supply line. This valve also directs a portion of the water through the refill tube to the overflow tube, maintaining the water level in the bowl.
- Float: The rising water in the tank lifts the float. When the water reaches the fill line, the float signals the fill valve to stop, preventing further water flow.
- Flush Valve and Overflow Tube: These components work together to ensure water flows from the tank to the bowl efficiently and to prevent tank overflow, respectively.
Understanding these components and their roles is crucial for diagnosing and fixing issues with a running toilet.
How the Water Cycle Works Inside the Toilet
The operation of a toilet is a mini-cycle of water use and reuse, guided by the principles of the water cycle. Here’s a simplified breakdown:
- Flushing: Initiating the flush sends water from the tank into the bowl, carrying waste through the trap and into the main drain.
- Refilling: The fill valve then replenishes the tank and, through the refill tube, adds water to the bowl to maintain the necessary seal against sewer gases.
- Water Treatment: Once flushed, the water enters the sewer system, eventually reaching a wastewater treatment plant. Here, it is treated and released back into a body of water, re-entering the natural water cycle through evaporation and precipitation.
This continuous cycle underscores the importance of a properly functioning toilet in conserving water and maintaining hygiene. By understanding these mechanics, homeowners are better equipped to tackle issues such as a running toilet, ensuring the system operates efficiently and effectively.
Diagnosing a Running Toilet
Common Causes
Identifying the underlying reasons for a running toilet is the first step towards effective troubleshooting. Common causes include:
- Worn-out Flapper: The flapper is crucial for creating a watertight seal between the tank and the bowl. Over time, it can deteriorate or become misaligned, causing a continuous leak.
- Faulty Fill Valve: This valve controls the water level within the tank. If it fails to shut off properly, water will continue to flow into the tank and possibly overflow into the bowl.
- Improper Chain Length: The chain connecting the flush handle to the flapper can be too short or too long, preventing the flapper from sealing properly after a flush.
- Misaligned or Damaged Float: The float regulates the water level in the tank. If misaligned or damaged, it may fail to signal the fill valve to stop the water flow at the correct level.
Initial Checks and Observations
To diagnose a running toilet, no special tools are required—just keen observation and simple adjustments:
- Visual and Auditory Inspection:
- Listen: If water sounds are heard without a recent flush, this indicates leakage.
- Look: Check for water flowing into the bowl without flushing. Water stains or a faint flow down the bowl sides suggest a leak.
- Manual Checks:
- Flapper Test: Press down on the flapper. If the running stops, the flapper likely needs replacement. Look for discoloration or warping as signs of wear.
- Chain Check: Ensure the chain isn’t too long (causing tangles) or too short (preventing a proper seal). Adjust or replace as necessary.
- Float Adjustment: For a float cup or ball, adjust its height to ensure it correctly controls the fill valve. This might involve bending the float arm or adjusting a screw on the float cup.
- Water Level Assessment:
- Check Overflow Tube: The water level should be 1 to 1.5 inches below the overflow tube. If too high, adjust the float to lower the water level in the tank.
By following these steps, homeowners can identify the specific issues causing their toilet to run. Adjustments or replacements of internal components, based on these observations, often resolve the problem without the need for professional intervention.
Fixing a Faulty Flapper
When water leaks from the toilet tank into the bowl, it often indicates an old or damaged flapper, which is the large rubber seal at the bottom of the toilet tank. This issue can lead to costly water bills, making it crucial to change out an old flapper to save money.
Identifying Flapper Issues
A malfunctioning flapper fails to seat itself properly back over the flush valve opening, allowing water to continue flowing into the bowl. To determine if the flapper is the source of the problem, one can perform a simple test by adding a few drops of food coloring to the tank and checking back after some time. If the water in the bowl changes color, it’s likely time for a new flapper. Flappers usually last around 2-3 years before needing replacement. Additionally, inspecting the flushing mechanisms of each toilet in the home annually can help catch potential water flow issues early.
Step-by-Step Flapper Replacement Process
- Turn Off the Water Supply and Flush the Toilet: This empties the tank, allowing for the removal of the old flapper.
- Remove the Old Flapper:
- Disconnect the flapper chain from the flush handle lever.
- Unhook the old flapper from the overflow tube’s pegs by removing it from the right and left tabs.
- Clean the Flush Valve Seat: Before installing the new flapper, clean the seat of the flush valve to ensure a good seal. Check for corrosion or unevenness, and wipe away any debris or sediment.
- Install the New Flapper:
- Choose a flapper with Microban technology to prevent bacteria from breaking down the material.
- Place the new flapper on the flush valve seat, ensuring it’s properly aligned with the opening.
- Hook each ear of the flapper onto the pegs on the sides of the flush valve.
- Connect the flapper chain to the flush handle lever, adjusting the chain length as needed. Ensure there’s about ½ inch of slack to prevent the chain from getting caught.
- Turn On the Water Supply and Test: Allow the tank to fill with water. Flush the toilet to ensure the flapper goes up and down smoothly and creates a good seal with the flush valve.
Remember, if the water still runs after replacing the flapper, the issue may lie with the fill valve or float, which would require further troubleshooting. Regular maintenance and timely replacement of the flapper can prevent running toilets, conserving water and saving on utility bills.
Adjusting or Replacing the Float and Fill Valve
When a toilet runs constantly or exhibits signs of inefficiency, the culprit is often the fill valve and its accompanying float. These components are vital for controlling the water flow into the toilet tank after each flush. Understanding how to adjust or replace these parts can save homeowners time and money, preventing unnecessary water wastage and ensuring the toilet operates smoothly.
Symptoms of a Faulty Fill Valve
Several indicators suggest the fill valve might be malfunctioning:
- Continuous running water sound from the toilet, indicating the fill valve isn’t shutting off the water flow properly.
- Extended refill times or a weak flush due to the fill valve not filling the tank efficiently.
- Inconsistent water levels in the tank, which can lead to poor flushing performance.
- Water leaking onto the floor around the toilet, a sign of a potential fill valve issue.
- A hissing sound or visible cracks and wear on the fill valve, signaling it’s time for a replacement.
How to Adjust the Float
Adjusting the float is a straightforward process that can rectify many fill valve issues:
- Identify the Type of Fill Valve: Determine if your toilet uses a float cup, float ball, or another type of fill valve. This will dictate the adjustment method.
- Adjusting a Float Cup Fill Valve: Locate the adjustment screw on the fill valve. Turning the screw clockwise will lower the water level, while counterclockwise will raise it.
- Adjusting a Float Ball Valve: For valves with a float ball, bend the float arm gently up or down to change the water level. Upward bends increase the water level, while downward bends decrease it.
- Monitor Water Level: Flush the toilet to observe the new water level. Adjust further if necessary to ensure the water stops filling about 1 inch below the overflow tube.
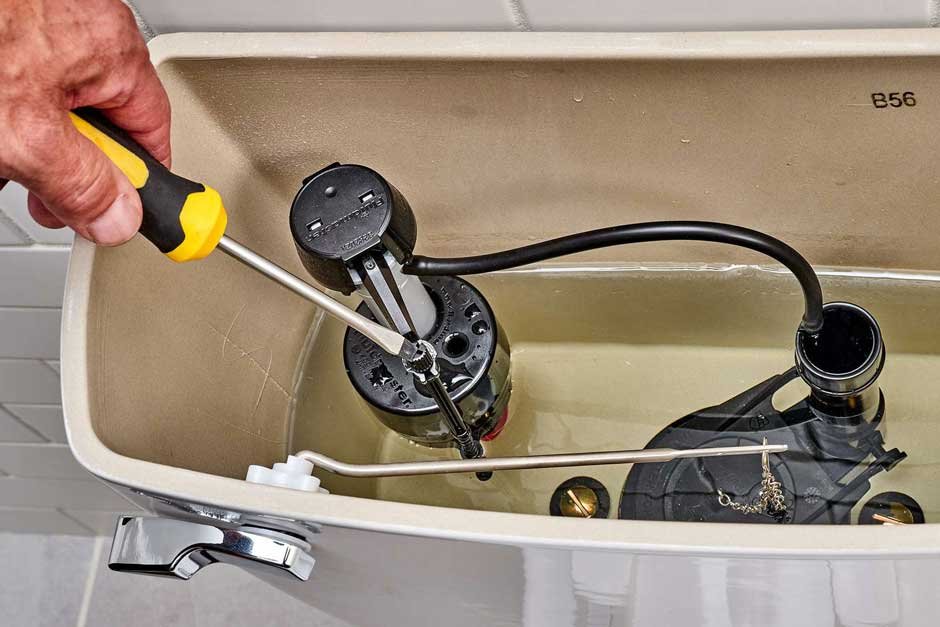
Replacing the Fill Valve
If adjustments do not solve the problem, replacing the fill valve is the next step:
- Turn Off Water Supply: Shut off the water supply to the toilet at the valve near the floor.
- Drain the Tank: Flush the toilet to drain water from the tank. Mop up any remaining water with a sponge.
- Remove Old Fill Valve: Unscrew the lock nut holding the fill valve to the tank. Lift out the old valve.
- Install New Fill Valve: Insert the new valve into the hole in the tank. Adjust the height according to the manufacturer’s instructions to ensure it sits correctly.
- Secure the Fill Valve: Hand-tighten the lock nut under the tank to secure the new fill valve. Use pliers for a final quarter turn but be careful not to overtighten.
- Reattach Water Supply: Screw the water supply line back onto the fill valve. Turn on the water supply and let the tank refill.
- Adjust Water Level: Adjust the new fill valve as needed to achieve the correct water level in the tank, typically about 1 inch below the overflow tube.
By diagnosing the symptoms early and either adjusting or replacing the fill valve and float, homeowners can ensure their toilets operate efficiently, conserving water and reducing utility bills.
Dealing with the Flush Valve and Chain
Identifying issues with the flush valve and chain is crucial for maintaining the efficiency of your toilet. The flush valve controls the flow of water into the bowl, and the chain connects the flushing mechanism to the flapper. Problems with these components can lead to a running toilet or inefficient flushing.
Identifying issues with the flush valve and chain
To ensure your toilet functions properly, inspect the flush valve for any signs of cracks or damage, as a compromised valve will need replacement. Similarly, examine the flush valve chain to ensure it’s correctly connected to both the flush valve and the toilet handle. The chain should provide enough slack for the flush valve to fully open when the handle is pressed, without getting caught or tangled.
Adjusting the flush valve chain
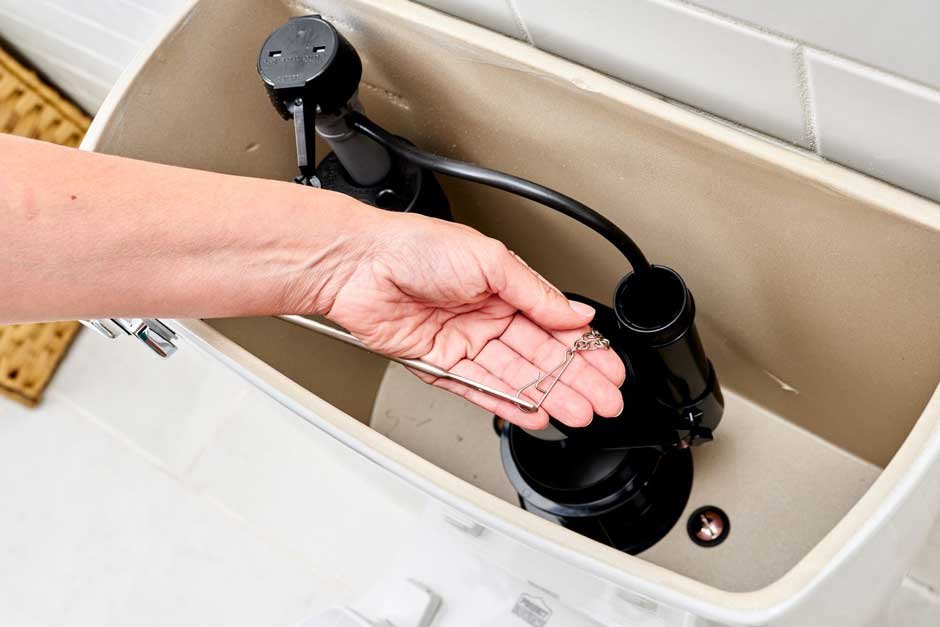
A flush valve chain that is either too tight or too loose can hinder proper operation. Here’s how to adjust it:
- Flush the toilet and observe the chain as the flush valve opens and closes, noting the slack in the chain.
- If the chain is too tight, gently loosen it with pliers to add more slack.
- Conversely, if the chain is too loose, tighten it with pliers to reduce slack.
- Test the adjustment by flushing the toilet again. Repeat the steps as necessary until the chain has the optimal amount of slack.
When to replace the flush valve
Over time, flush valves can wear out or become damaged, which can cause leaks or affect flushing performance. Signs that it’s time to replace the flush valve include:
- Visible cracks or breaks on the flush valve.
- The valve not sealing correctly, leading to a constantly running toilet.
- The valve not opening fully during a flush, resulting in poor flushing performance.
Replacing the flush valve is a manageable DIY task. Remember to turn off the water supply before beginning the repair to prevent leaks and ensure a smooth process.
Solving Water Level Problems in the Tank
Adjusting the water level in the toilet tank is a critical step in ensuring the efficient operation of your toilet. An incorrect water level can lead to either insufficient flushing power or excessive water use. Fortunately, adjusting the water level is a straightforward process that homeowners can accomplish with a few simple steps.
Adjusting the Water Level
- Identify the Type of Fill Valve: Toilets may have different types of fill valves, including float cup or float ball mechanisms. Identifying the type is crucial for making accurate adjustments.
- Locate the Adjustment Mechanism: Most modern toilets have a screw or clip on the fill valve for adjusting the water level. This is usually found attached to the float.
- Make the Adjustment:
- For a float cup fill valve, look for a small screw or clip that can be turned to adjust the float’s height. Turning the adjustment screw clockwise will lower the water level, while turning it counter-clockwise will raise it.
- If your toilet has a float ball, the adjustment involves bending the float arm. Bending the arm downward lowers the water level, and bending it upward raises the water level.
- Check Manufacturer’s Recommendations: It’s essential to set the water level according to the manufacturer’s specifications, usually found inside the tank. The recommended level is often about a half-inch to an inch below the overflow tube.
- Test and Fine-Tune: After making adjustments, flush the toilet to ensure the new water level is appropriate. Additional fine-tuning may be necessary to achieve the optimal level.
Impact of Water Level on Toilet Function
The water level within the toilet tank significantly impacts the toilet’s flushing efficiency and water usage. A too high water level can lead to water wastage and increased utility bills, as excess water overflows into the drain pipe. Conversely, a water level that is too low may result in weak flushes, failing to clear the bowl effectively.
- Optimal Flushing: Maintaining the correct water level ensures the toilet flushes efficiently, clearing the bowl and preventing clogs.
- Water Conservation: Adjusting the water level to the manufacturer’s recommendation helps conserve water, contributing to environmental sustainability and reducing water bills.
- Preventing Overflow: Ensuring the water level is below the overflow tube prevents the risk of water spilling over into the bowl continuously, which can be both wasteful and annoying.
By carefully adjusting the water level in the tank and understanding its impact on toilet function, homeowners can ensure their toilets operate efficiently and economically. Regular checks and adjustments as part of routine maintenance can prevent problems before they arise, contributing to a well-functioning household plumbing system.
Addressing External Leaks
External leaks in toilets can lead to significant water wastage and potential damage to your bathroom floor. Identifying and fixing these leaks promptly can save homeowners from costly repairs and high water bills. This section will guide you through identifying external leaks and fixing supply line and tank-to-bowl connections.
Identifying External Leaks
External leaks in toilets can originate from several sources, including the toilet supply line, the tank-to-bowl connection, and the base of the toilet. Here are common causes and signs to look for:
- Toilet Supply Lines:
- Old or Worn-out Supply Lines: Supply lines can deteriorate over time, leading to cracks and leaks.
- Corrosion: Exposure to chemicals in the water can cause supply lines to rust.
- Loose Fittings: Fittings that are not tight enough can allow water to escape.
- High Water Pressure: Excessive pressure can cause supply lines to burst.
- Improper Installation: Incorrectly installed fittings can lead to leaks.
- Tank-to-Bowl Connection:
- Worn Gaskets: The gasket between the tank and bowl can degrade over time.
- Loose Bolts: Bolts holding the tank to the bowl can loosen, causing leaks.
- Base of the Toilet:
- Wax Seal Failure: The wax seal between the toilet base and the floor can break, especially if the toilet rocks or moves.
- Corrosion of Fittings: Fittings at the base can corrode, leading to leaks.
Fixing Supply Line and Tank to Bowl Connections
Step 1: Turn off the Water Supply
Always start by turning off the water supply to the toilet. This can typically be done at the shutoff valve located near the floor behind the toilet.
Step 2: Drain the Water
Flush the toilet to drain water from the tank and bowl. This may require multiple flushes. Hold down the handle to ensure all water is removed.
Step 3: Disconnect the Supply Line
Use an adjustable wrench to disconnect the supply line from the toilet tank. Keep a bucket or towel handy to catch any residual water.
Step 4: Inspect and Replace the Supply Line
Inspect the supply line for any visible damage, such as cracks or corrosion. If damaged, measure and replace it with a new line of the correct length.
Step 5: Reconnect and Test
Reconnect the supply line and turn on the water supply. Flush the toilet to check for leaks. Tighten any fittings if leaks are present.
For tank-to-bowl leaks:
- Tighten or Replace Bolts: Check the bolts connecting the tank to the bowl. Tighten if loose or replace if corroded.
- Replace Gaskets: If leaks persist, consider replacing the tank-to-bowl gasket to ensure a proper seal.
For leaks at the base:
- Replace the Wax Seal: If the toilet rocks or if there’s water at the base, the wax seal likely needs replacement. Remove the toilet, clean the flange, and install a new wax seal.
- Tighten Bolts at the Base: Ensure the bolts securing the toilet to the floor are tight to prevent movement and leaks.
Addressing external leaks promptly can prevent water damage and save on water bills. Regular inspections and maintenance of the toilet’s supply line, tank-to-bowl connections, and base can help identify potential issues before they become significant problems.
Preventive Maintenance for Toilets
Preventive maintenance for toilets is essential for homeowners to avoid unnecessary repairs and replacements, which can be costly. By paying attention to your toilet and addressing small issues before they escalate, you can save a significant amount of money and water. A running toilet, for instance, can waste hundreds of gallons of water and substantially increase your water bill. This section will guide you through the preventive measures you can take to maintain the efficiency of your toilet.
Regular Inspection Routines
- Monthly Inspections: Set a reminder to inspect your toilet monthly. Look for signs of leaks, wear, or damage. This includes checking the caulking around the base of the toilet to ensure it’s not deteriorated, which could cause the toilet to become loose.
- Check the Flapper: Since toilet flappers are made of rubber, they tend to harden or warp after four or five years, failing to create a seal and allowing water to leak from the flush valve into the bowl. Inspect the flapper for signs of wear and replace it if necessary.
- Inspect the Fill Valve: The fill valve, being constantly exposed to water, is prone to clogs or leaks. It usually lasts about five years. Observe the fill valve during a flush to ensure it stops dispensing water once the proper water level is reached.
- Water Supply Line and Connection: Ensure that the connection between the water supply line and the fill valve is securely hand-tightened. If adjustments do not resolve leakage issues, consider replacing the water supply line, which typically lasts about 10 years.
- Seal Inspection: The seal between the toilet base and the floor is crucial for preventing leaks and odors. If you notice unpleasant odors or water pooling around the base, it may be time to replace the seal.
Replacing Worn-Out Parts Before They Fail
- Flapper Replacement: Given that flappers can cost you $600 a year in wasted water if they leak, replacing them every 3-5 years or at the first sign of wear is a wise decision. This simple step can prevent a constantly running toilet and save on water bills.
- Fill Valve and Supply Line: Replace the fill valve and supply line before they fail, typically every five to ten years. Consider using products like Fluidmaster’s PerforMAX 400H Toilet Fill Valve and Click Seal Water Supply Lines for durable replacements.
- Toilet Seal: An airtight, watertight seal is vital for preventing leaks and odors. Fluidmaster’s Better Than Wax toilet seal offers a user-friendly and durable option that’s guaranteed to last 10 years.
- Everything Toilet Tank Repair Kit: For a comprehensive solution, consider an all-in-one repair kit that includes essential components like the fill valve, flush valve, flapper, and tank-to-bowl gasket. This kit can address common issues such as leaks, weak flushes, or slow filling.
By incorporating these regular inspection routines and replacing worn-out parts before they fail, homeowners can ensure their toilets operate efficiently and effectively. This proactive approach to toilet maintenance not only conserves water but also saves money and frustration in the long run.
Conclusion
Throughout this article, we’ve explored the various facets of maintaining and repairing a running toilet, emphasizing the importance of homeowner intervention in preventing water wastage and ensuring efficient toilet operation. By understanding the mechanics of a toilet, diagnosing common issues, and implementing the discussed DIY solutions—including addressing flapper faults, adjusting or replacing the fill valve, dealing with the flush valve and chain, solving water level problems, and tackling external leaks—homeowners are equipped with the knowledge to maintain their toilets effectively.
Moreover, the article highlighted the significance of regular preventive maintenance and timely replacement of toilet components to avoid more significant issues down the line. By adopting these practices, homeowners can save on water bills, avoid costly repairs, and contribute to water conservation, ultimately ensuring the longevity and reliability of their household toilets. This proactive approach not only benefits the individual homeowner but also supports the broader goal of sustainable water management.